Profile a CUDA app with gpufl trace
This tutorial walks through a complete first trace capture with GPUFlight:
- Write a simple CUDA application.
- Compile it and run the executable.
- Build
gpufl-client. - Run
gpufl traceagainst the CUDA executable. - Upload the trace to
app.gpuflight.com.
The runnable sample source for this tutorial is maintained in the
gpufl-tutorial/tutorial-01 folder.
Prerequisites
You need:
- A CUDA-capable NVIDIA GPU
- NVIDIA driver
- CUDA Toolkit
- CMake 3.24 or newer
- A C++ compiler supported by CUDA
- Git
On Windows, install Visual Studio 2022 with the C++ workload. On Ubuntu, install a GCC/G++ version supported by your CUDA Toolkit.
1. Write a simple CUDA application
The sample app launches a vector-add kernel 50 times so the trace has enough kernel activity to inspect.
The kernel is intentionally small:
__global__ void vector_add(const float* a, const float* b, float* c, int n) {
    const int idx = blockIdx.x * blockDim.x + threadIdx.x;
    if (idx < n) {
        c[idx] = a[idx] + b[idx];
    }
}
Full source: vector_add.cu
The full sample allocates device buffers, copies input data to the GPU, launches the kernel repeatedly, synchronizes, copies the output back, and validates the result.
2. Compile it and make it executable
Windows
From tutorial-01:
cmake -S . -B build -G "Visual Studio 17 2022" -A x64
cmake --build build --config Release
.\build\Release\gpufl_tutorial_01.exe
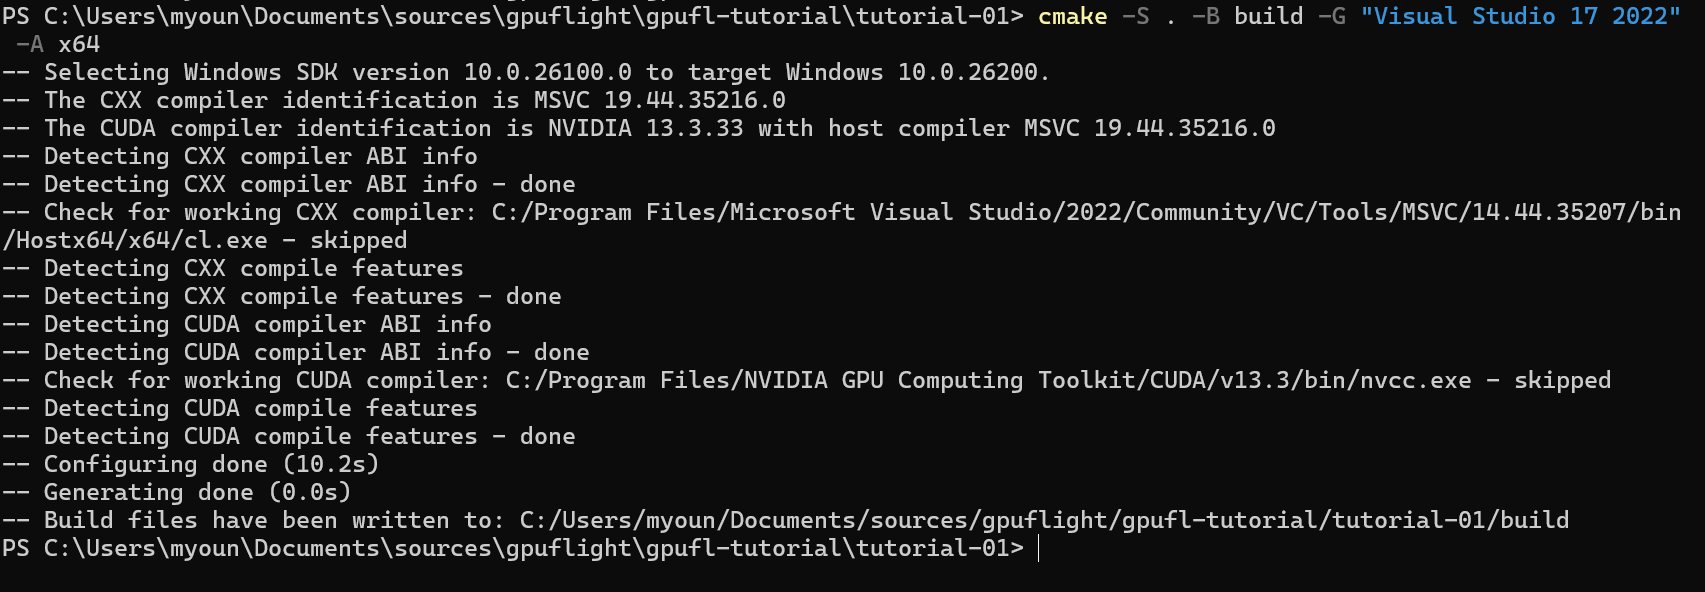
CMake configures the tutorial project with Visual Studio 2022 and CUDA.
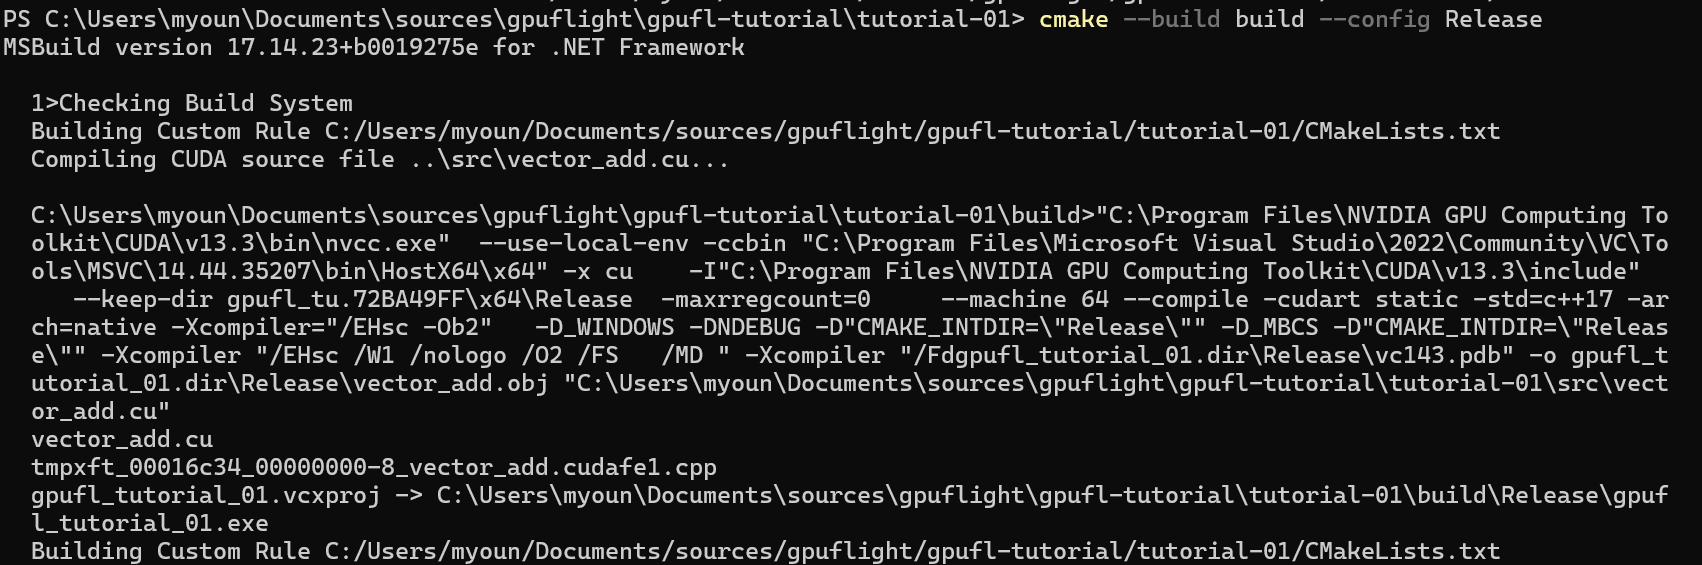
The Release build compiles vector_add.cu and produces gpufl_tutorial_01.exe.
Expected output:
Vector add completed successfully: 50 kernel launches, 1048576 elements
Linux - Ubuntu
From tutorial-01:
cmake -S . -B build -DCMAKE_BUILD_TYPE=Release
cmake --build build -j
./build/gpufl_tutorial_01
Expected output:
Vector add completed successfully: 50 kernel launches, 1048576 elements
3. Clone gpufl-client
Clone the GPUFlight client source:
git clone https://github.com/gpu-flight/gpufl-client.git
cd gpufl-client
If you already have the repository locally, use that checkout instead.
4. Build gpufl-client
Windows
From the gpufl-client repository:
.\build-windows.ps1
.\build-windows\daemon\launcher\Release\gpufl.exe version
For the rest of the Windows commands, set a PowerShell variable that points to the launcher executable:
$gpufl = "C:\path\to\gpufl-client\build-windows\daemon\launcher\Release\gpufl.exe"
Linux - Ubuntu
From the gpufl-client repository:
cmake -S . -B build -DCMAKE_BUILD_TYPE=Release -DGPUFL_ENABLE_NVIDIA=ON
cmake --build build -j
./build/daemon/launcher/gpufl version
For the rest of the Linux commands, set a shell variable that points to the launcher executable:
GPUFL=/path/to/gpufl-client/build/daemon/launcher/gpufl
Add a screenshot of the successful gpufl-client build here.
5. Run gpufl trace
gpufl trace launches your target process with GPUFlight injection enabled.
For this tutorial, the target process is the vector-add executable.
Windows
From tutorial-01:
& $gpufl trace `
  --name tutorial-01-vector-add `
  --output .\gpufl-logs `
  -- .\build\Release\gpufl_tutorial_01.exe
Linux - Ubuntu
From tutorial-01:
$GPUFL trace \
  --name tutorial-01-vector-add \
  --output ./gpufl-logs \
  -- ./build/gpufl_tutorial_01
After the command finishes, inspect the output directory:
gpufl-logs/
The exact file names can vary, but the trace output should include GPUFlight event logs such as device, scope, and system events.

The trace launcher captures the sample, writes .gpufl-logs, and exits after the target completes.
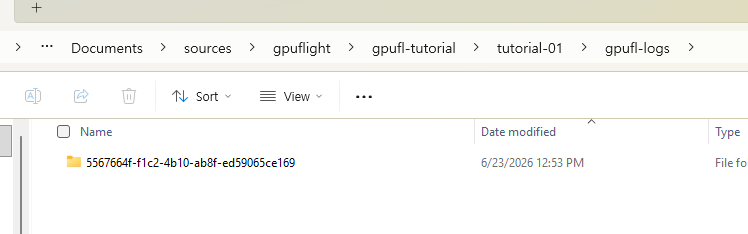
GPUFlight writes one session folder under gpufl-logs for this run.
6. Upload to app.gpuflight.com
There are three useful upload paths:
- Drag and drop the generated trace files in the dashboard.
- Start the uploader agent during
gpufl trace. - Upload after the run with
gpufl upload.
Use the one that matches your workflow.
Join app.gpuflight.com
Create or join your GPUFlight account at:
https://app.gpuflight.com/register
6.1 Upload by drag and drop
- Sign in to
https://app.gpuflight.com. - Open the trace upload area.
- Drag the generated log files from
gpufl-logsinto the upload area. - Review the upload plan and click Upload 1 session.
- Wait for the upload status to move from received, to uploading, to done.
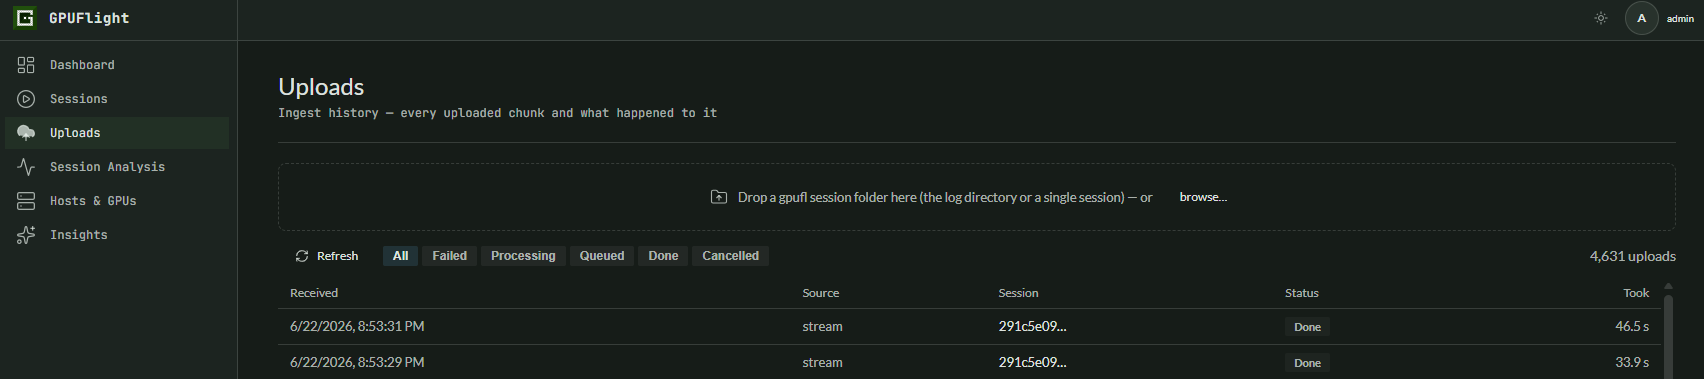
Open Uploads and drop a GPUFlight log directory, a single session folder, or the generated log files.
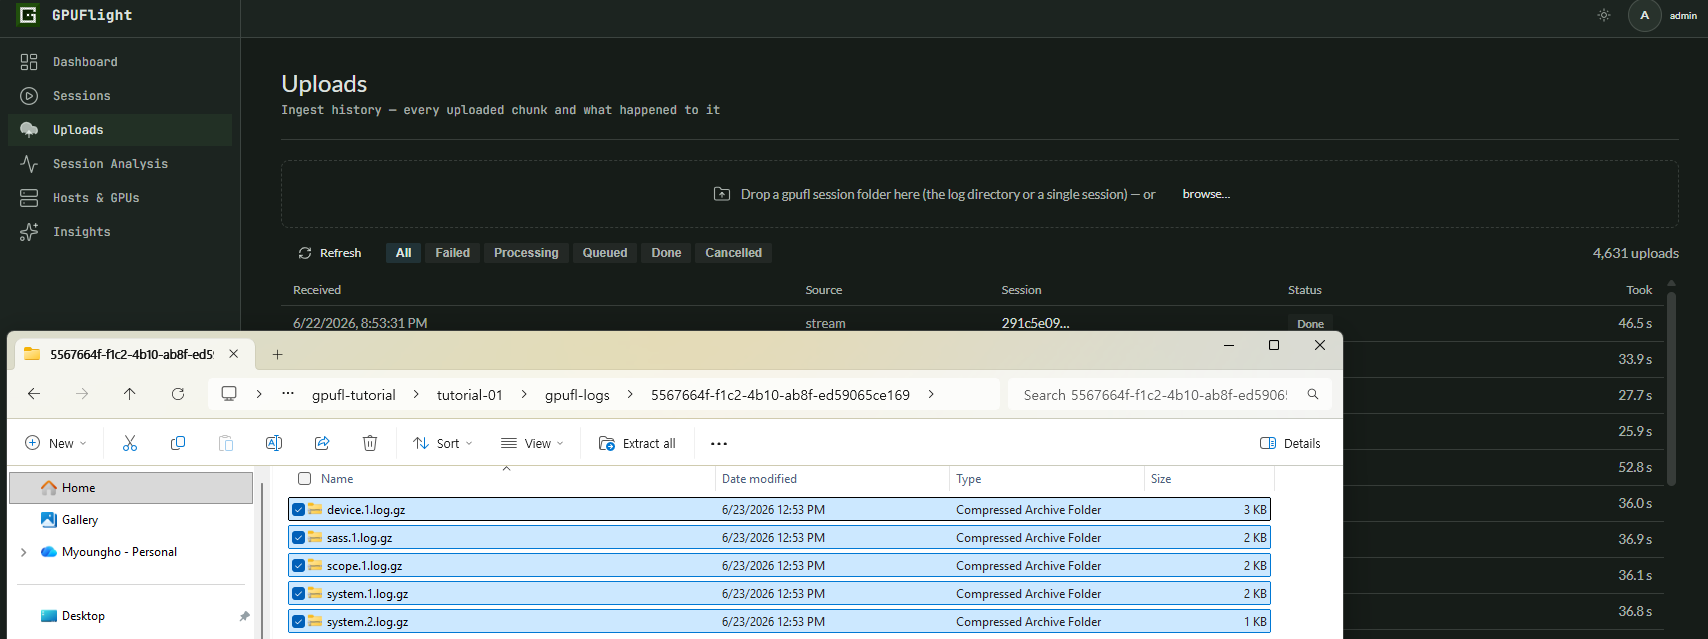
This run produced compressed event logs inside the generated session folder.
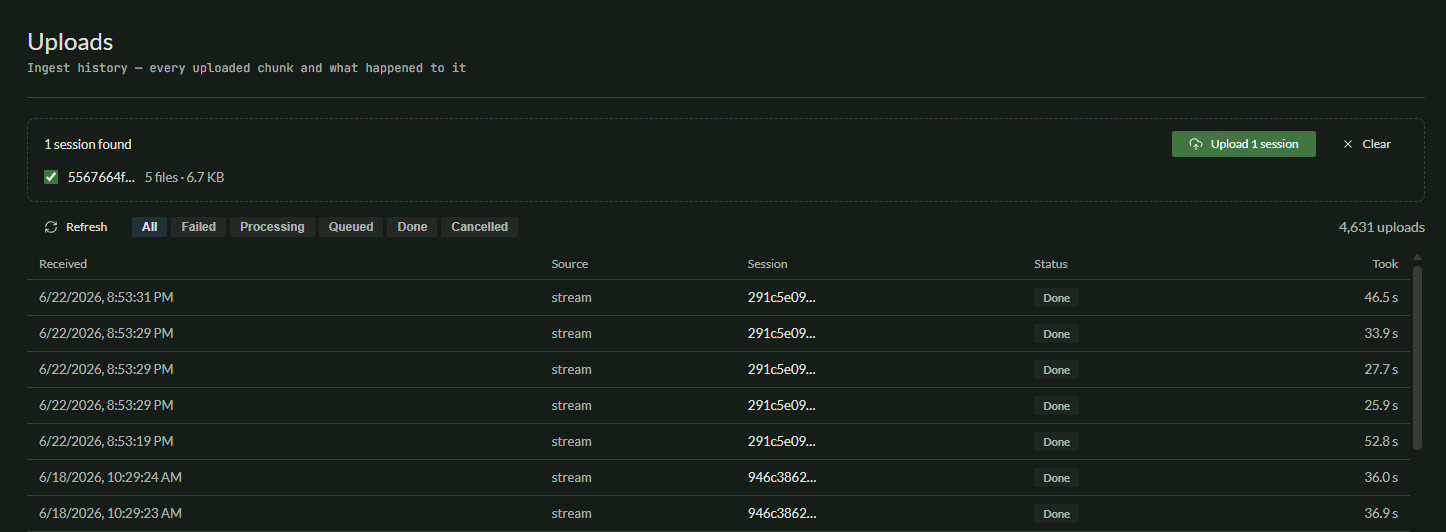
After the files are dropped, GPUFlight detects one session and shows the upload plan.
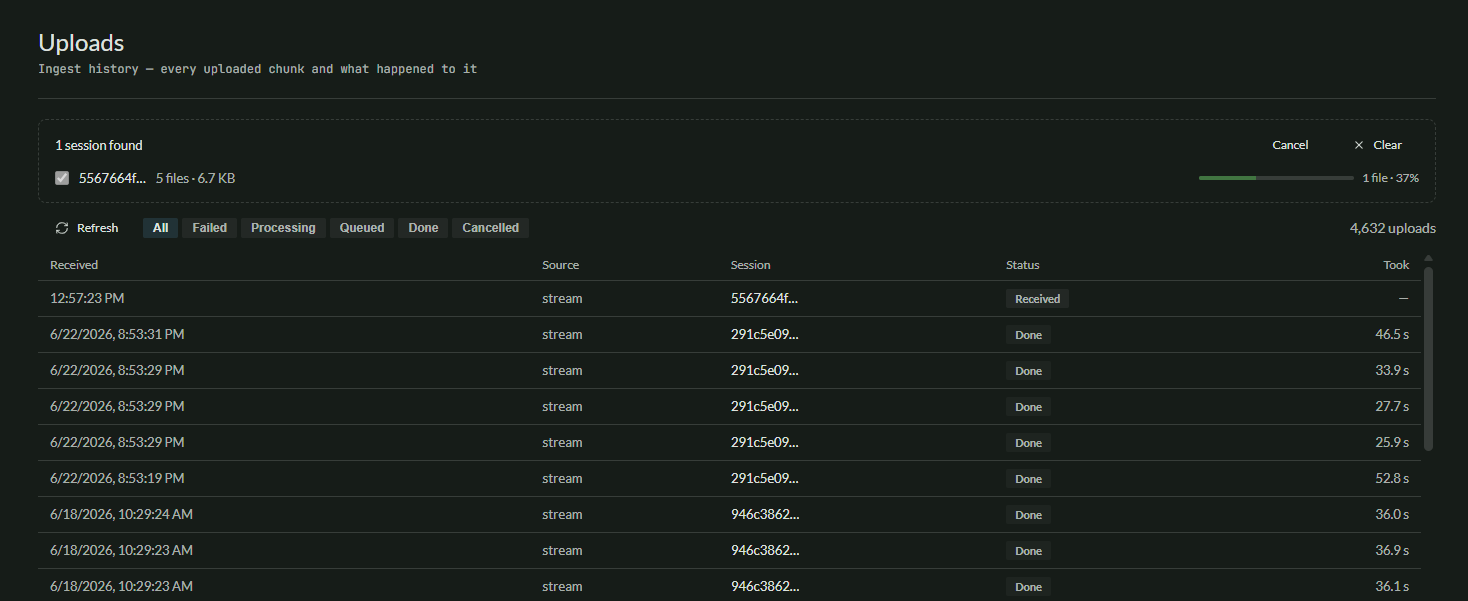
During upload, the newest row first appears with a Received status while the files stream to the backend.
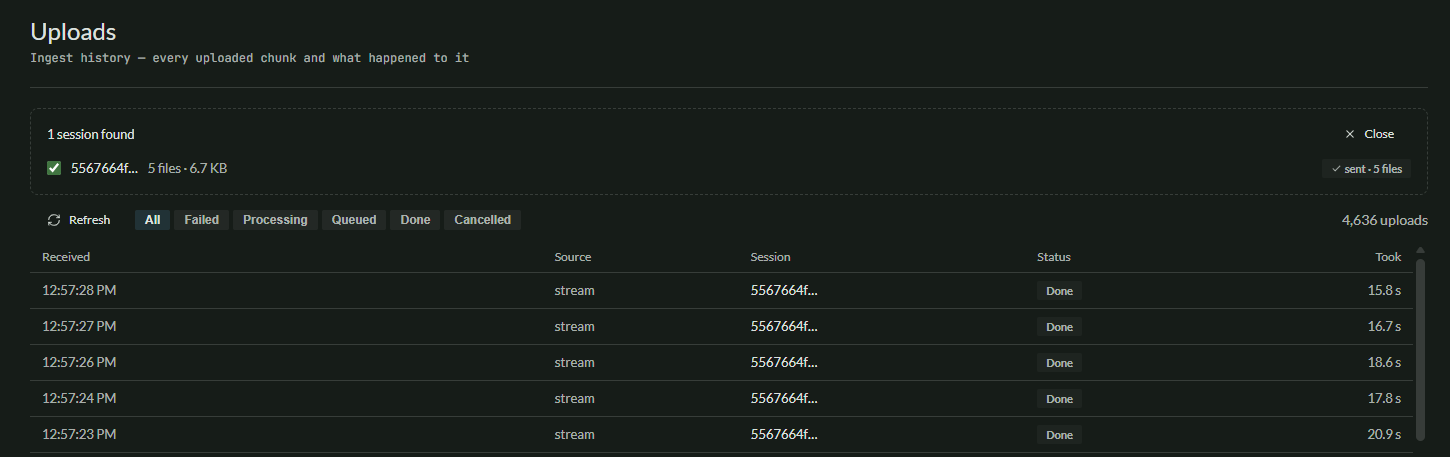
When all files are sent, the upload panel shows the session as sent and the ingest history rows move to Done.
6.2 Upload using gpufl-agent
This mode is useful when you want the trace command to start an uploader process for the generated logs.
Create an API key
Open Settings, then API keys. Click Generate key, give the
key a name such as tutorial-uploader, choose an expiration, and click
Generate.
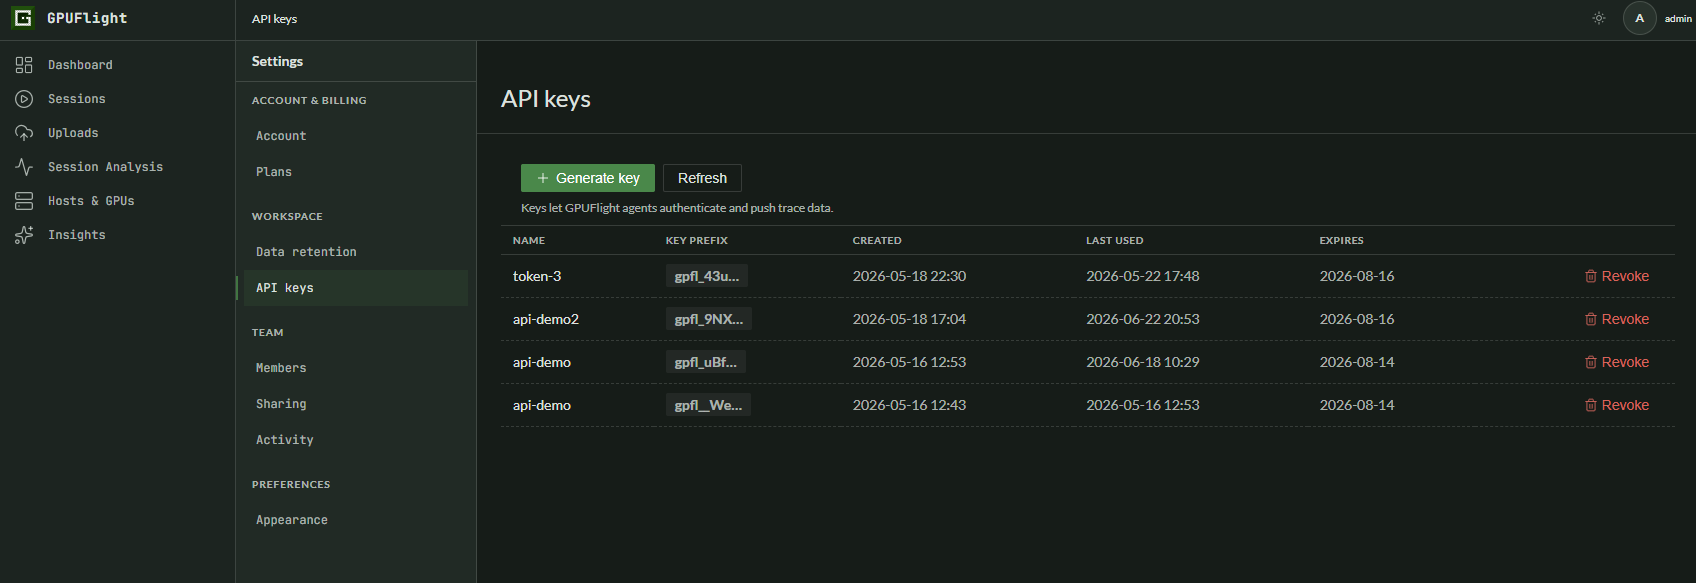
API keys live under Settings. Use them when a local agent or CLI command needs to upload trace data.
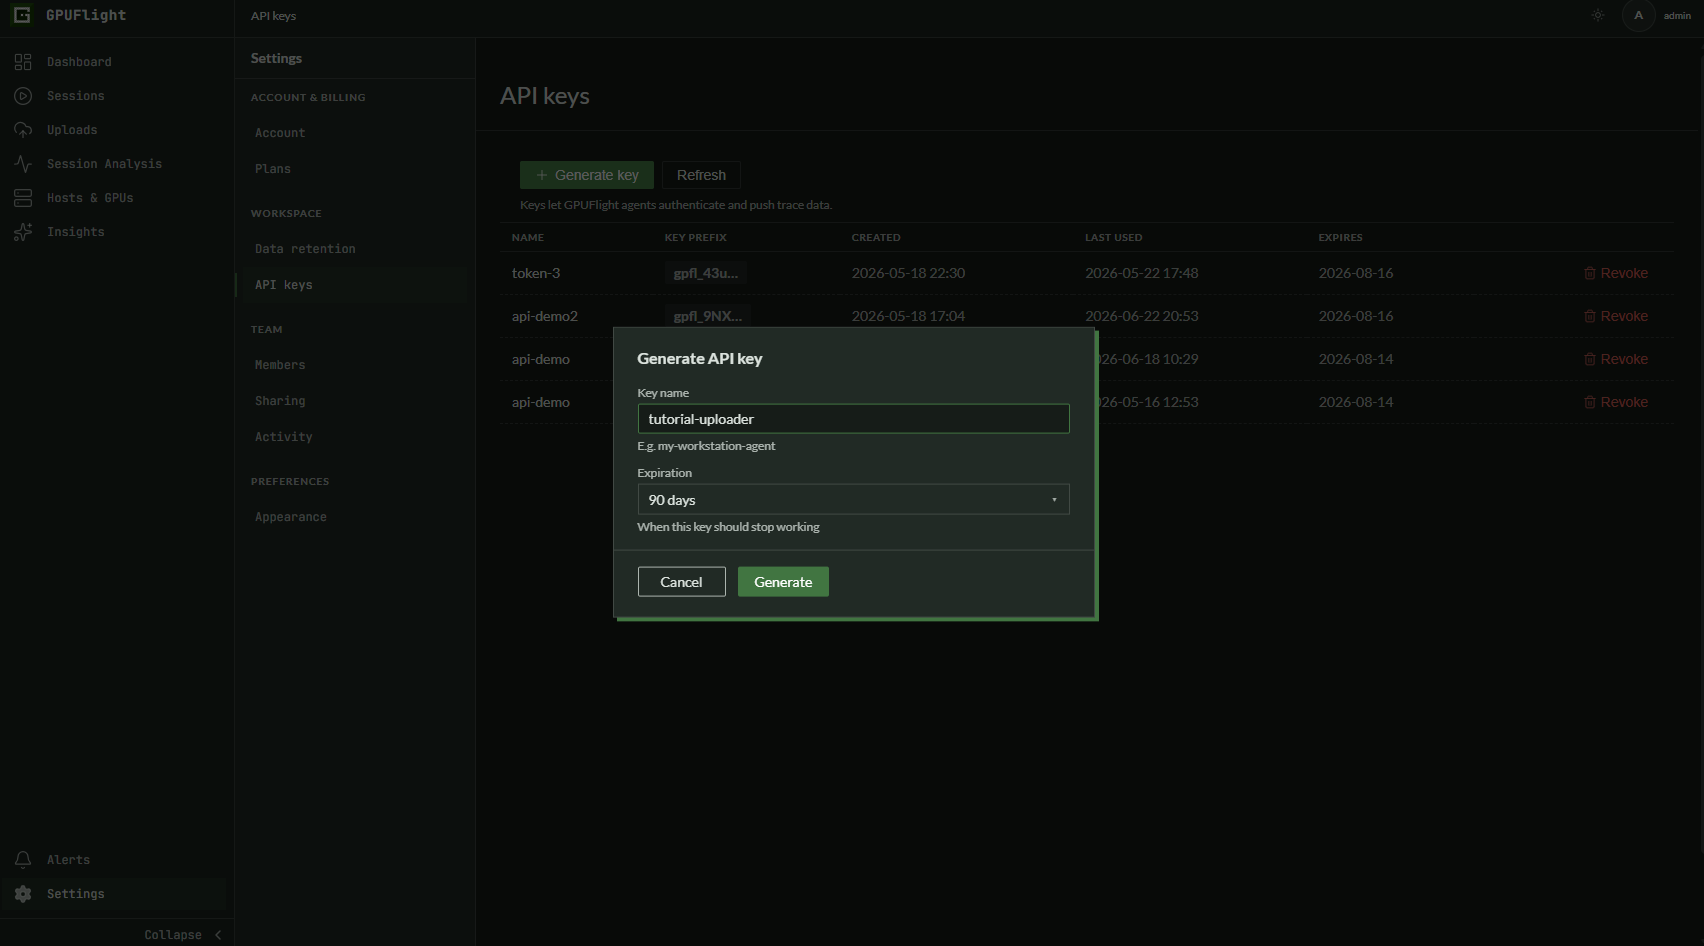
Create a key for this tutorial run and choose an expiration that matches your workflow.
After the key is generated, copy it immediately and store it securely. The dashboard only shows the full key once.
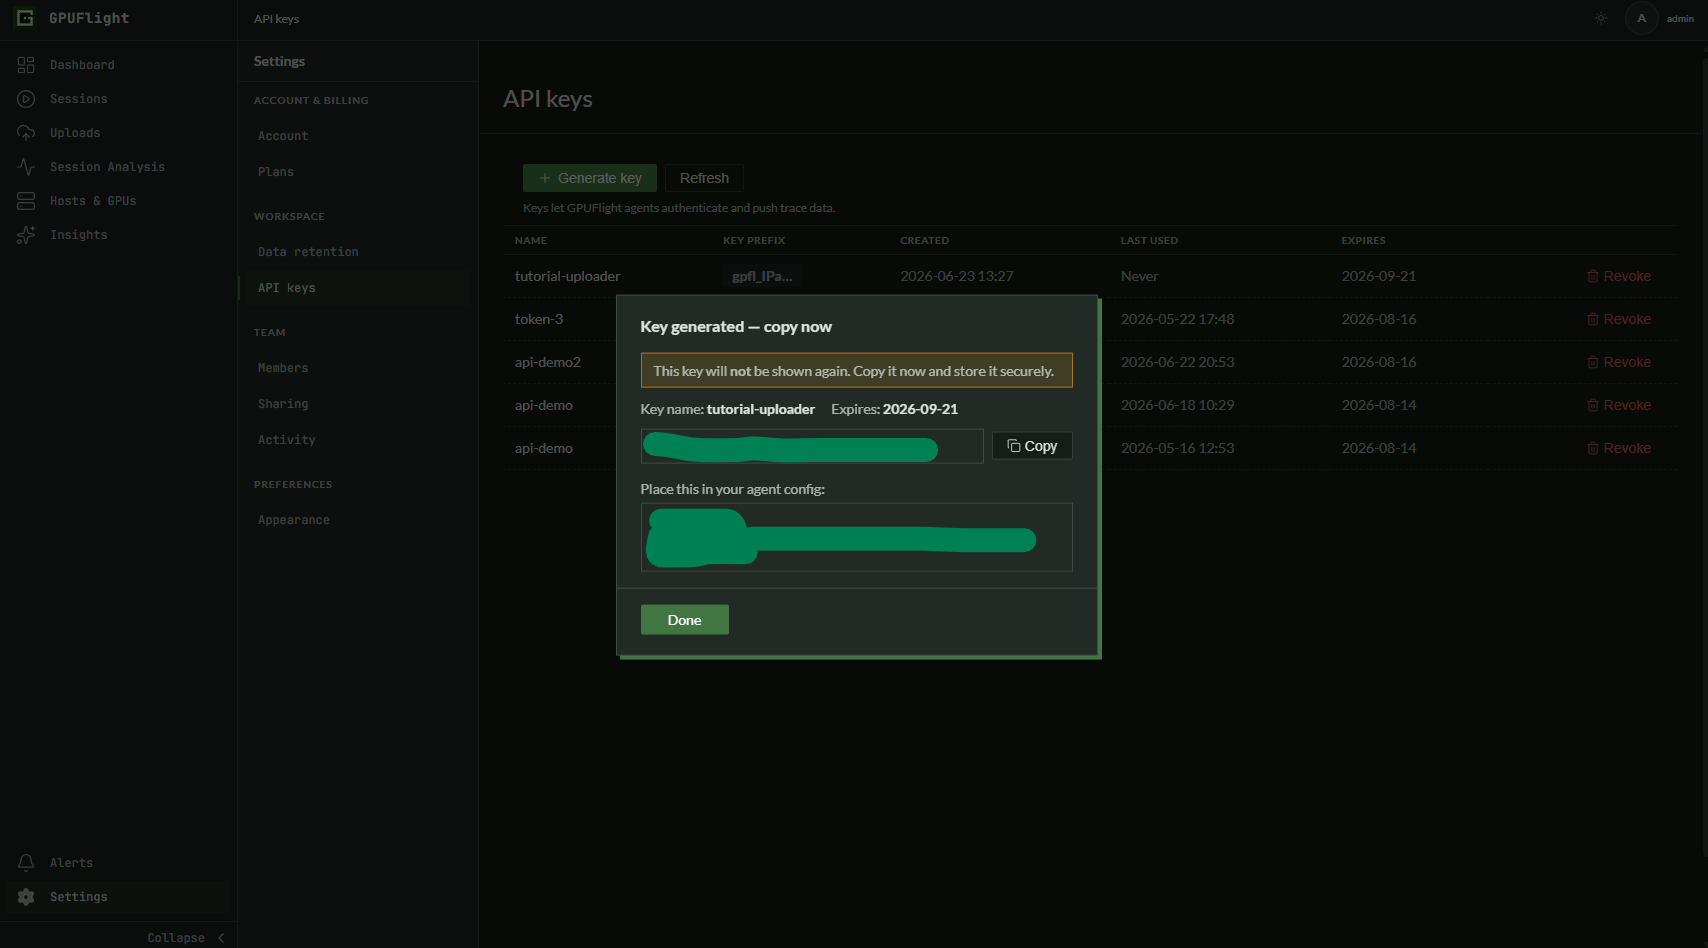
Copy the generated key before closing the dialog.
Recommended environment variables:
$env:GPUFL_BACKEND_URL = "https://api.gpuflight.com"
$env:GPUFL_API_KEY = "gpfl_xxxxxxxxxxxx"
export GPUFL_BACKEND_URL=https://api.gpuflight.com
export GPUFL_API_KEY=gpfl_xxxxxxxxxxxx
Download gpufl-agent
Download the agent from gpu-flight/gpufl-agent.
Install JDK 25, then verify Java is on your PATH:
java -version
Keep the downloaded agent JAR path handy.
$agentJar = "C:\path\to\gpufl-agent.jar"
AGENT_JAR=/path/to/gpufl-agent.jar
Run gpufl trace with the agent
The --upload flag starts gpufl-agent while the trace is running. The
agent tails the generated log files and streams them to the backend.
& $gpufl trace `
  --name tutorial-01-vector-add `
  --output .\gpufl-logs `
  --upload `
  --agent-jar $agentJar `
  -- .\build\Release\gpufl_tutorial_01.exe
$GPUFL trace \
  --name tutorial-01-vector-add \
  --output ./gpufl-logs \
  --upload \
  --agent-jar "$AGENT_JAR" \
  -- ./build/gpufl_tutorial_01
Because GPUFL_BACKEND_URL and GPUFL_API_KEY are already set, the
command does not need to repeat --backend-url or --api-key.
If you type the PowerShell command interactively across multiple lines, press Enter after the final executable path to submit the completed command.
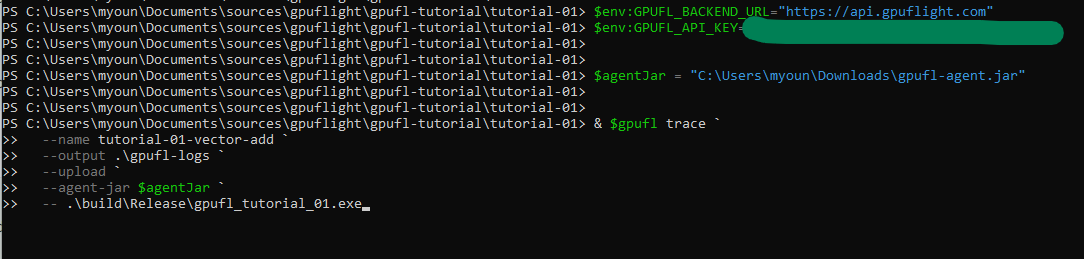
The trace command uses the API key environment variable, the downloaded agent JAR, and --upload.
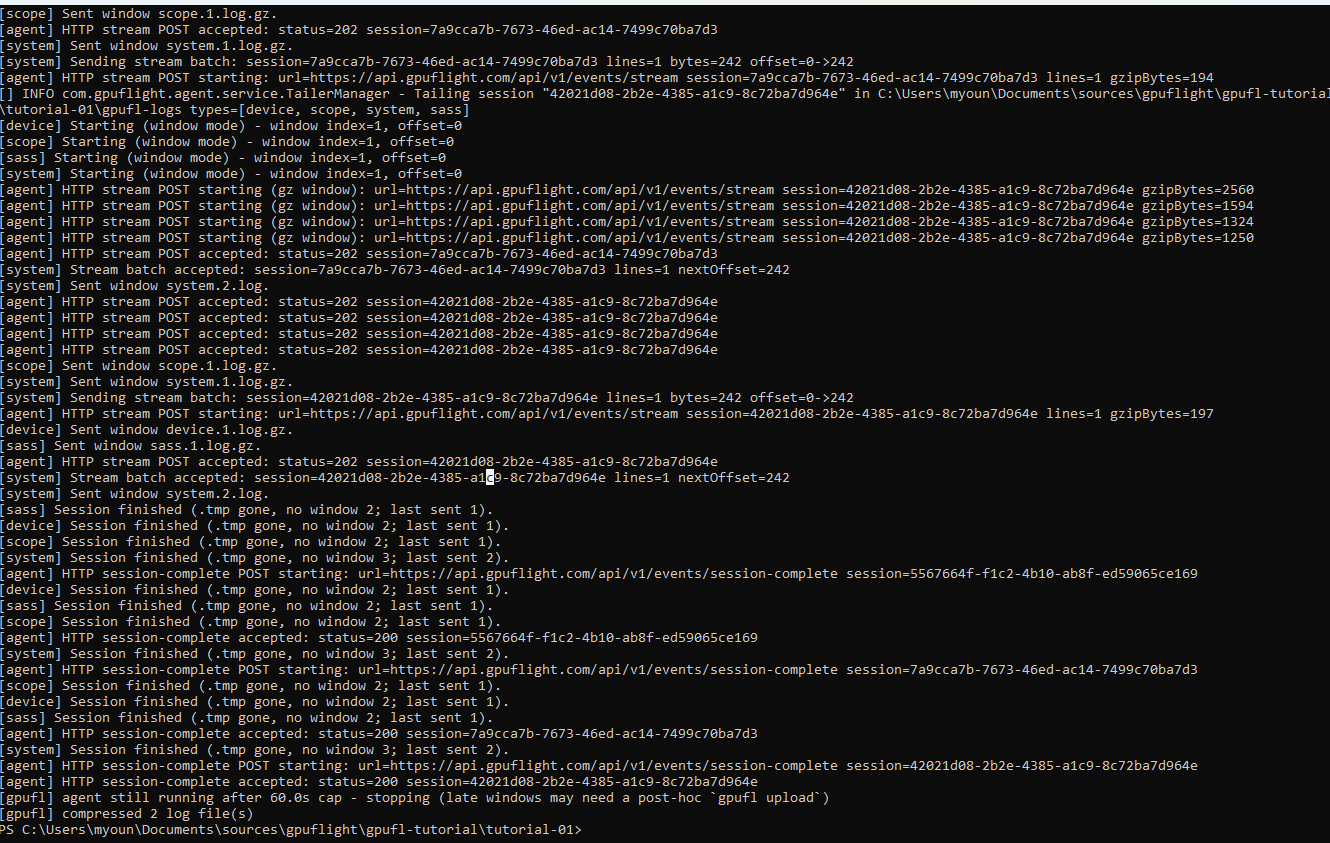
The agent streams each log channel, receives HTTP accepted responses, marks sessions complete, and then the launcher exits.
6.3 Upload using gpufl upload
Use this path when the profiling run already completed and you want to upload the saved trace directory afterward.
& $gpufl upload .\gpufl-logs `
  --backend-url $env:GPUFL_BACKEND_URL `
  --api-key $env:GPUFL_API_KEY
$GPUFL upload ./gpufl-logs \
  --backend-url "$GPUFL_BACKEND_URL" \
  --api-key "$GPUFL_API_KEY"
To upload all sessions inside a trace directory:
gpufl upload ./gpufl-logs --all-sessions
7. Confirm the session in the dashboard
Open https://app.gpuflight.com and confirm that the session appears.
For this sample, look for:
- Session name:
tutorial-01-vector-add - Kernel count near 50
- Vector-add kernel activity
- Host/device copy events
- System telemetry, if enabled by the trace mode

The uploaded session first appears on the Sessions page while processing is still in progress.
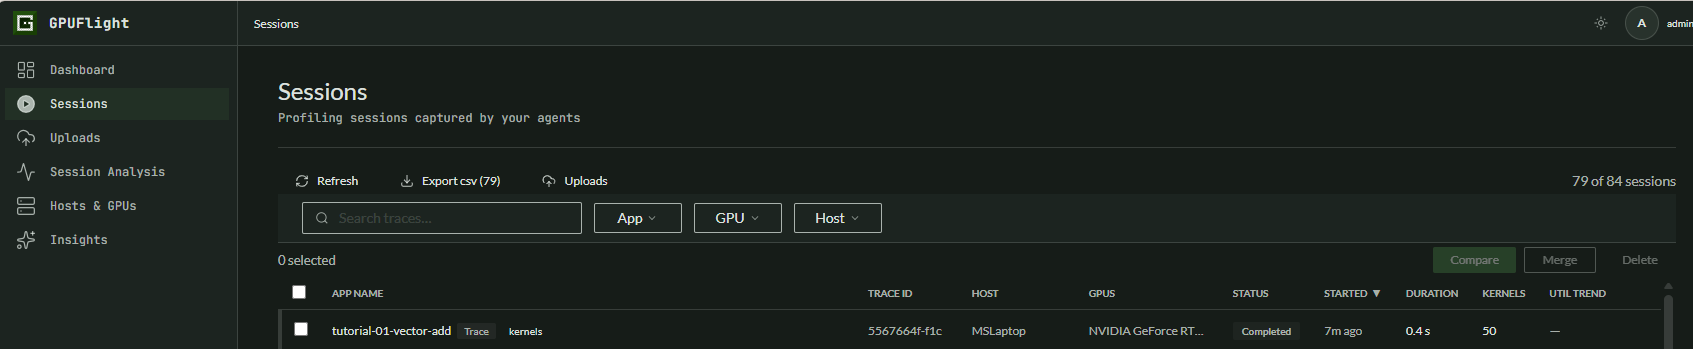
After processing finishes, the same session moves to Completed.
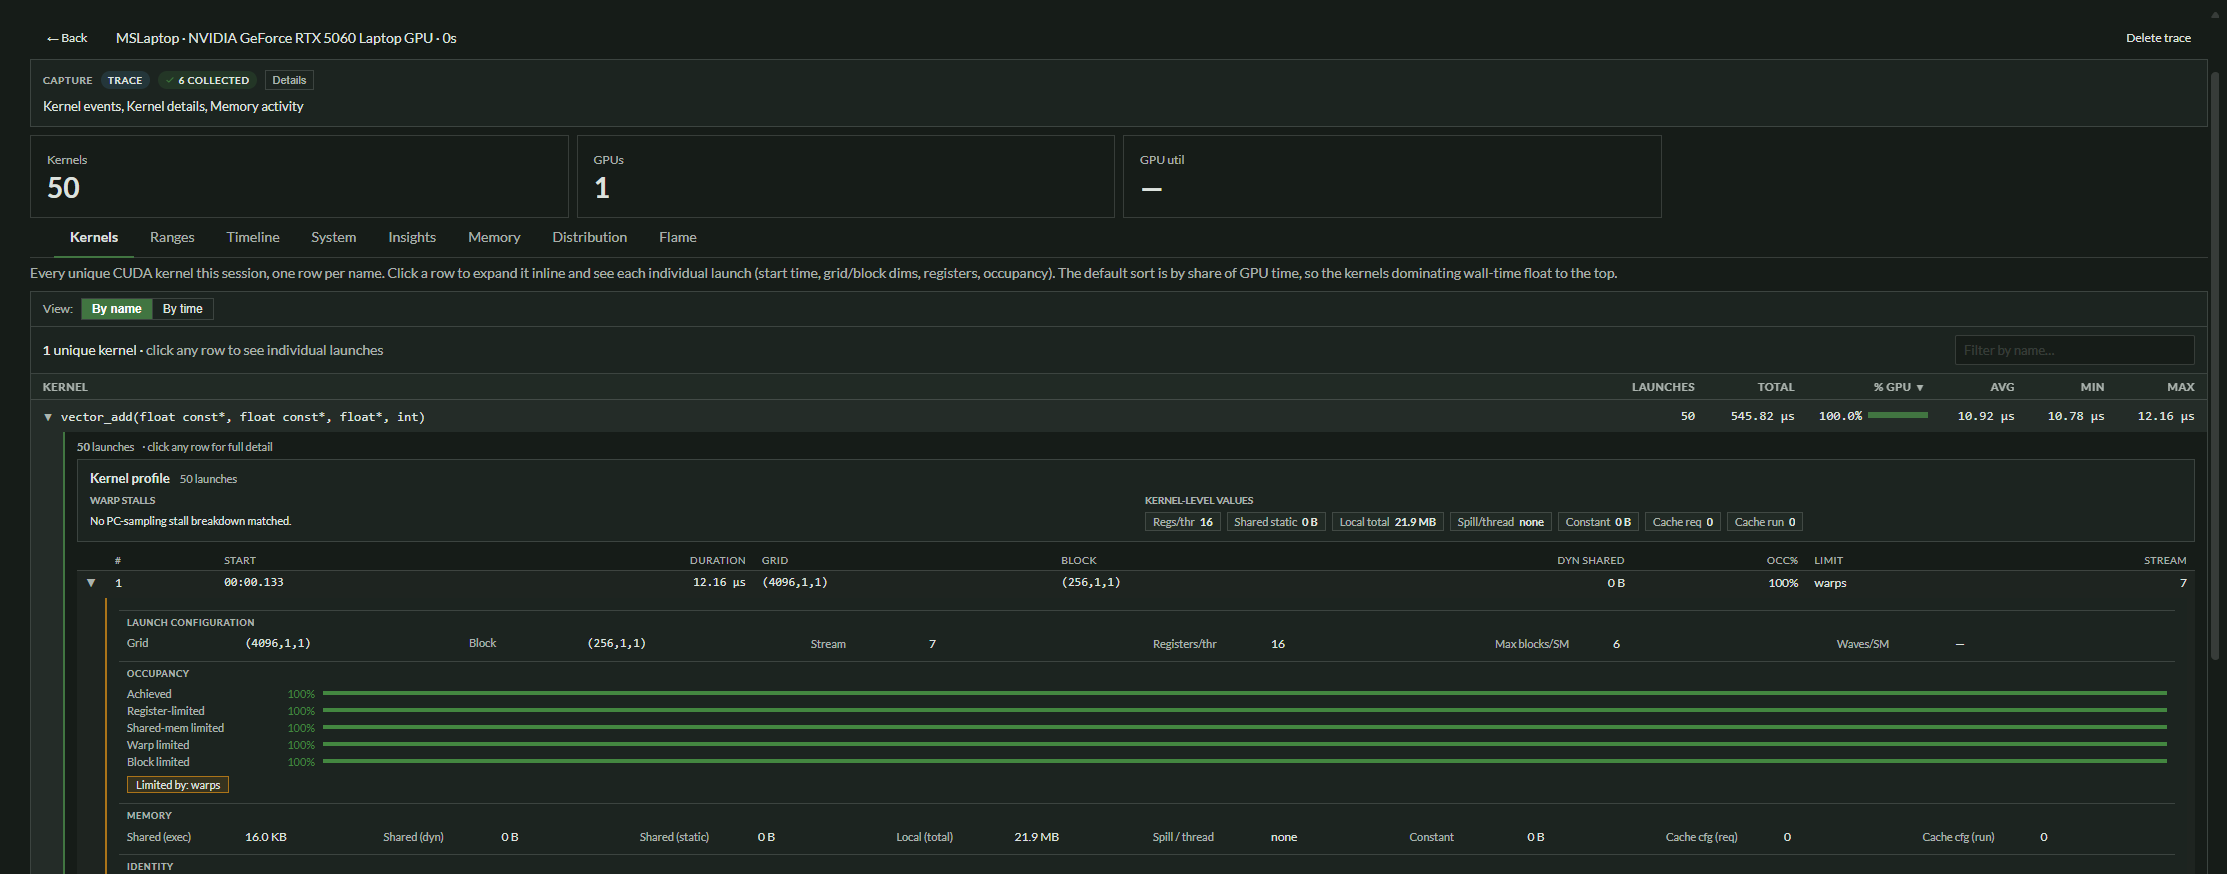
The kernel view shows 50 launches of the vector-add kernel and per-launch details such as duration, grid, block, registers, stream, and occupancy.
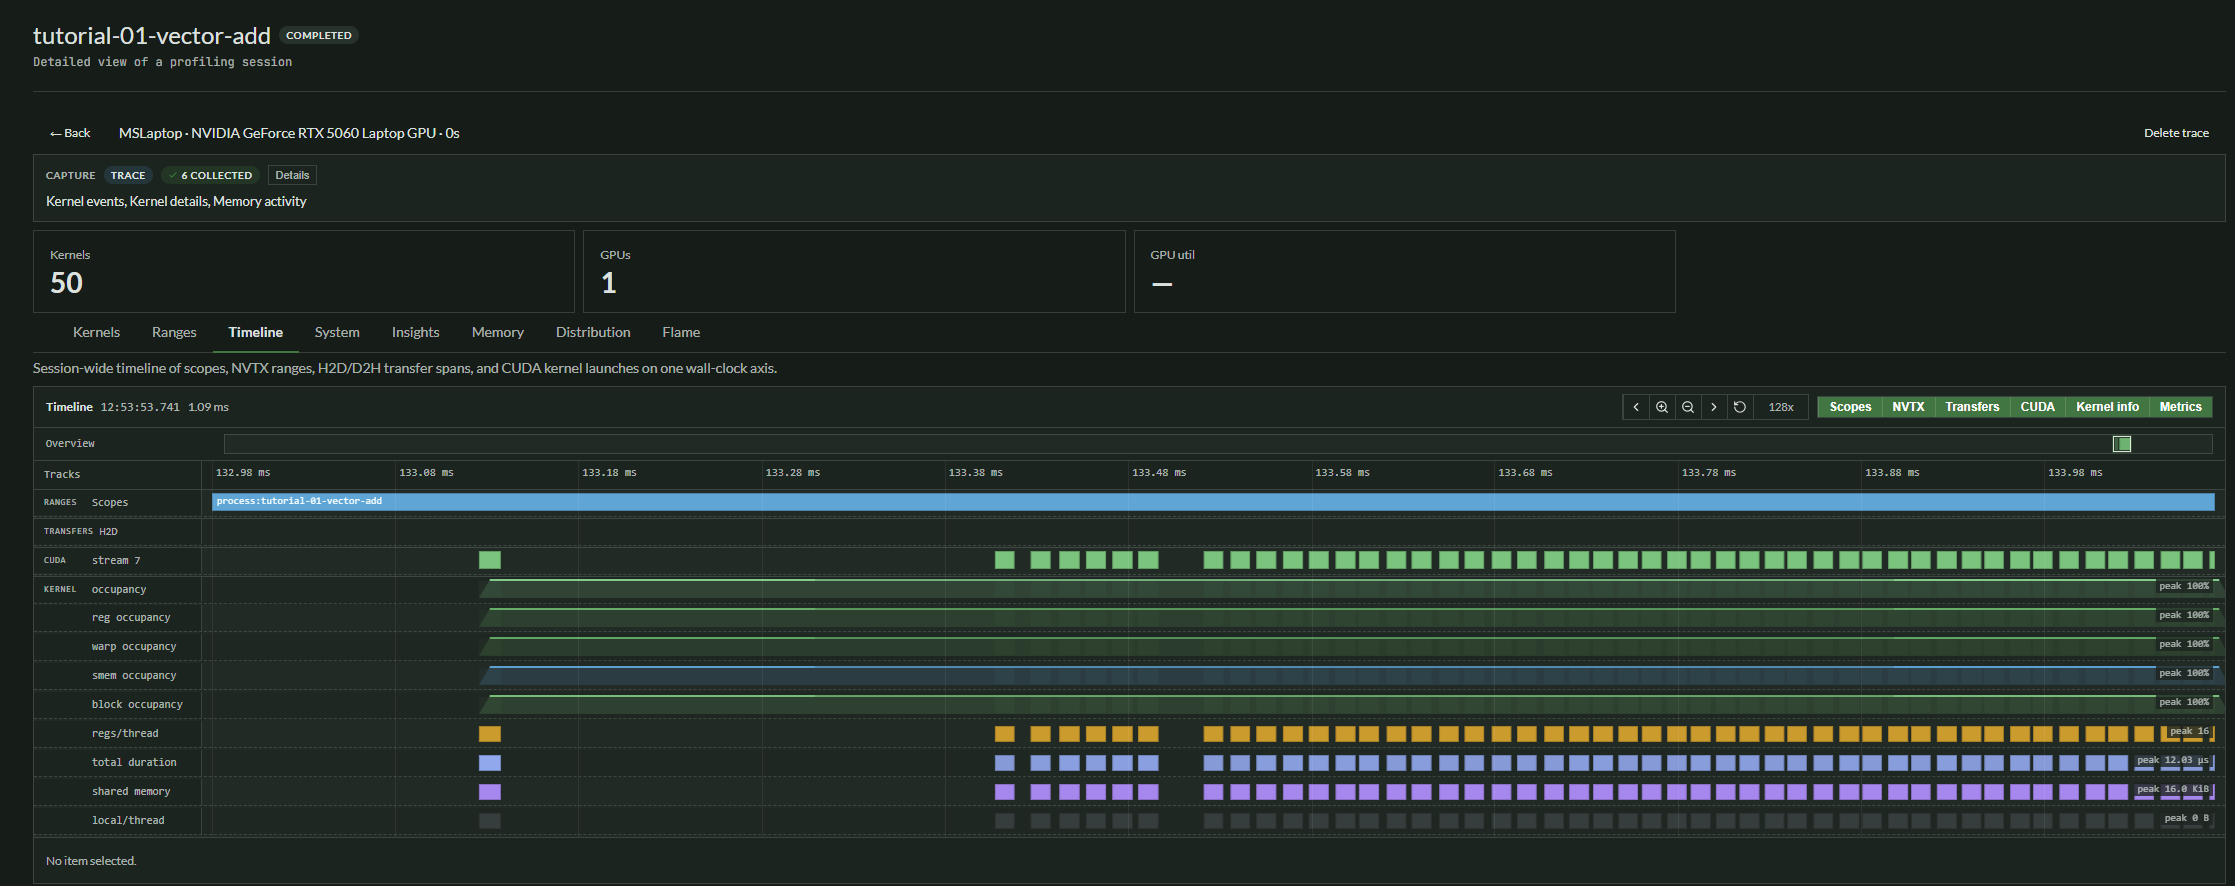
The timeline view shows the same CUDA kernel launches on a wall-clock axis.
Troubleshooting
gpufl is not recognized
Use an absolute path to the launcher executable, or add the launcher directory to your PATH.
& "C:\path\to\gpufl.exe" version
/path/to/gpufl version
The CUDA app runs, but the trace is empty
Check that:
- You launched the app through
gpufl trace. - The app actually launches CUDA kernels.
- The CUDA Toolkit and NVIDIA driver are installed correctly.
- The target command appears after
--.
Upload fails
Check that:
GPUFL_BACKEND_URLpoints to the correct backend.GPUFL_API_KEYis set and valid.- The trace output directory exists.
- The agent JAR path is correct if you use
--upload --agent-jar.